Hardwood floors add timeless beauty and value to any home, but keeping them clean without causing damage requires the right approach. Whether you’re dealing with daily dust or stubborn scuffs, understanding proper hardwood floor care will help preserve your floors’ natural luster for decades.
This comprehensive guide covers everything from daily maintenance routines to deep cleaning methods, product recommendations, and the most common cleaning mistakes that can permanently damage your hardwood.
Understanding Your Hardwood Floor Finish Before You Clean
Before reaching for any cleaning product, the most important step is identifying your floor’s finish type. Modern hardwood floors typically have a polyurethane or similar protective coating that seals the wood, making them relatively low-maintenance. However, older floors may have wax finishes, oil finishes, or shellac that require different care approaches.
To determine your floor’s finish, place a small drop of water on an inconspicuous area. If the water beads up and sits on the surface, you have a sealed floor with polyurethane or a similar finish. If the water soaks in and darkens the wood, your floor is likely unsealed or has an older finish that needs special attention.
Most cleaning advice in this guide applies to sealed polyurethane-finished floors, which represent the majority of modern hardwood installations. If you have unsealed, waxed, or oil-finished floors, consult your flooring manufacturer’s specific care instructions or a professional flooring specialist before proceeding with any wet cleaning method.
The Essential Step-by-Step Process for Cleaning Hardwood Floors
Step 1: Remove Loose Dirt and Debris First
Never skip the dry cleaning step. Dirt, sand, and grit act like sandpaper on hardwood, gradually wearing down the finish with every footstep. Before any wet cleaning, thoroughly remove all loose particles using one of these methods:
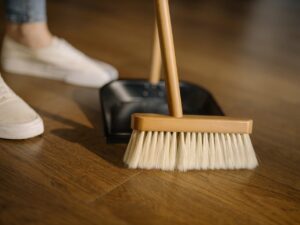
Sweeping: Use a soft-bristle broom designed for hardwood floors. Sweep gently to avoid scratching the surface, working in the direction of the wood grain whenever possible.
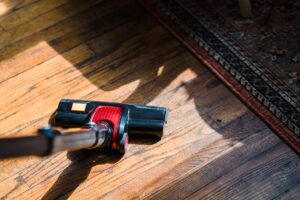
Vacuuming: This is often the most effective method for capturing fine dust and pet hair. Use a vacuum with a hardwood floor setting or a soft brush attachment. Avoid vacuum cleaners with beater bars or rotating brushes, as these can scratch the finish. For best results, vacuum high-traffic areas at least twice weekly.
Dust mopping: A microfiber dust mop excels at trapping fine particles that brooms might miss. These mops use electrostatic action to capture dust without stirring it into the air, making them ideal for people with allergies.
Step 2: Choose the Right Mop and Cleaning Solution
The golden rule for hardwood floor cleaning is minimal moisture. Excess water is hardwood’s greatest enemy, potentially causing warping, cupping, gaps between boards, or finish damage that can take months or years to become apparent.
The best mop types for hardwood floors:
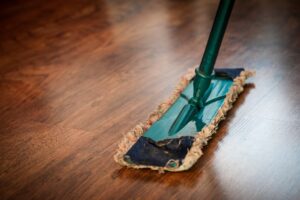
Microfiber flat mops are the professional standard for hardwood cleaning. These mops use removable, washable pads that hold just the right amount of moisture without over-saturating the floor. Their low profile allows easy maneuvering under furniture and into tight spaces.
Spray mops designed specifically for hardwood floors offer a convenient built-in solution dispensing, but only if used correctly. The key is applying cleaning solution to the mop pad, not directly onto the floor, to maintain moisture control.
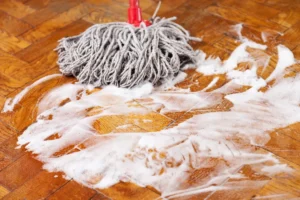
Traditional string mops should be avoided entirely. They hold too much water and are nearly impossible to wring out sufficiently for safe hardwood cleaning. Even when “well-wrung,” they typically leave puddles that can seep between boards.
Safe cleaning solutions for hardwood floors:
For routine cleaning of polyurethane-finished floors, you have several effective options:
pH-neutral hardwood floor cleaners are specifically formulated to clean without leaving residue or dulling the finish. Products like Bona Hardwood Floor Cleaner, Method Squirt + Mop Wood Floor Cleaner, and similar commercial hardwood cleaners are designed to evaporate quickly without streaking. These are your safest bet for regular use.
A mild dish soap solution can work for occasional cleaning. Mix just a few drops of gentle, pH-neutral dish soap in a gallon of warm water. The solution should be barely sudsy. Too much soap will leave a film that attracts dirt and makes floors look dull.
Vinegar and water is sometimes recommended, but should be used with caution. While diluted white vinegar (1/2 cup per gallon of water) can cut through grime, its acidity may gradually degrade certain floor finishes over time. If you choose vinegar, use it sparingly and never at full strength. Some flooring manufacturers specifically advise against vinegar, so check your warranty terms first.
Step 3: The Proper Mopping Technique
Proper technique matters as much as the right tools. Follow these steps for streak-free, damage-free results:
Dampen your mop properly: Dip your microfiber mop pad in cleaning solution, then wring it out thoroughly. The pad should be damp to the touch, not dripping. When you press it against your hand, no water should squeeze out.
Work in small sections: Don’t try to mop the entire floor at once. Work in 4-by-6-foot sections, which allows you to maintain control and ensure even cleaning.
Mop with the grain: Always move your mop in the direction of the wood grain, not across it. This technique pushes dirt along the natural lines of the wood rather than into seams and crevices.
Use light pressure: Let the microfiber do the work. Excessive pressure doesn’t clean better and may damage the finish over time.
Overlap your strokes: Make slightly overlapping passes to ensure complete coverage without missing spots.
Change water as needed: If you’re cleaning a large area, change to a fresh cleaning solution when the water becomes visibly dirty. Mopping with dirty water just redistributes grime across your floor.
Step 4: Dry the Floor if Necessary
In most cases, properly damp mopping won’t leave standing moisture. However, if you notice any wet areas, buff them dry immediately with a clean, dry microfiber cloth or towel. Never let water puddle or sit on hardwood, especially near seams, edges, or areas where the finish might be compromised.
Best Hardwood Floor Cleaners: What to Look For
When shopping for commercial hardwood floor cleaners, prioritize these characteristics:
Residue-free formulation: The cleaner should dry clear without leaving a waxy buildup, sticky film, or dull residue. Residue attracts dirt and makes floors look worse over time.
pH-neutral or slightly alkaline: Extremely acidic or alkaline cleaners can degrade polyurethane finishes. Look for products with a pH between 7 and 10.
Quick-drying formula: Cleaners designed for hardwood should evaporate rapidly, minimizing moisture exposure time.
No harsh chemicals: Avoid products containing ammonia, bleach, or petroleum-based solvents, which can discolor or damage wood finishes.
Top-rated commercial cleaners consistently recommended by flooring professionals and consumer testing organizations include:
- Bona Hardwood Floor Cleaner: The professional favorite, Bona is pH-neutral, dries residue-free, and is safe for polyurethane, varnish, and oil-modified finishes. It’s available in ready-to-use spray bottles or concentrated refills.
- Method Squirt + Mop Wood Floor Cleaner: This plant-based formula cleans effectively without harsh chemicals and leaves a pleasant, non-overpowering scent. The squeeze bottle design makes it easy to control solution amounts.
- Bruce Hardwood Floor Cleaner: Specifically formulated by a major flooring manufacturer, Bruce’s cleaner is designed to work with their floors but is safe for most polyurethane-finished hardwood.
- Murphy Oil Soap: While traditional, Murphy’s should be used carefully and in very diluted amounts. It’s an oil-based cleaner that can leave buildup if overused, but it works well for occasional deep cleaning when properly diluted.
Always follow the manufacturer’s dilution instructions exactly. More cleaning does not mean better cleaning; it usually means more residue.
Best Mops and Tools for Hardwood Floors
Investing in quality cleaning tools pays dividends in easier maintenance and better results.
Microfiber flat mops: Brands like O-Cedar, Bona Premium Microfiber Mop, and Swiffer WetJet Wood (when used with appropriate wood-safe pads) are reliable choices. Look for mops with machine-washable, replaceable pads to avoid ongoing costs and reduce waste.
Hardwood-safe vacuums: Vacuums marketed specifically for hardwood floors typically feature soft brush rolls, adjustable suction, and scratch-resistant wheels. Dyson, Shark, and Bissell all make models with dedicated hard floor settings. Stick vacuums are particularly convenient for quick daily maintenance in high-traffic areas.
Soft-bristle brooms: If you prefer traditional sweeping, choose a broom with fine, flexible bristles designed for smooth surfaces. Avoid stiff outdoor brooms that can scratch.
Microfiber dust mops: The Swiffer Sweeper (with dry cloths only) and dedicated microfiber dust mops are excellent for daily dust removal without scratching.
What Never to Use on Hardwood Floors
Avoiding these common mistakes will prevent costly damage:
Never use excessive water: Steam mops, dripping wet mops, or bucket-and-wring string mops all introduce too much moisture. Water can seep between boards, penetrate the finish, and cause the wood to swell, warp, or develop dark water stains that are difficult or impossible to remove.
Never use abrasive cleaners or tools: Scouring powders, abrasive scrub pads, or stiff brushes will scratch the protective finish. Once scratched, these areas become vulnerable to moisture damage and staining.
Avoid harsh chemicals: Bleach, ammonia, and undiluted vinegar can discolor wood and degrade polyurethane finishes. Petroleum-based cleaners may leave residue or soften certain finish types.
Don’t use wax or polish on polyurethane floors: Products designed to “restore shine” often contain waxes or polishes that create buildup on modern polyurethane finishes. These products are meant for traditional wax-finished floors, not contemporary sealed hardwood. The buildup attracts dirt and creates a dull, streaky appearance.
Skip the furniture polish: Using furniture polish or oil-based cleaners on floors creates dangerously slippery surfaces and leaves residue that’s difficult to remove.
Avoid one-step “shine” products: Cleaning products that promise to “clean and shine” in one step typically leave a film. True shine on hardwood comes from a clean, residue-free surface, not from added coatings.
How to Clean Different Hardwood Floor Finishes
While most modern floors have polyurethane finishes, older homes or specialty installations may require different approaches:
Polyurethane-sealed floors (most common): These floors have a protective plastic-like coating that makes them water-resistant and durable. They can handle the damp mopping methods described throughout this guide. Clean regularly with pH-neutral cleaners and avoid excessive moisture.
Oil-finished or oiled floors: These floors have a more natural appearance with minimal surface coating. They require special oil-based cleaners or soap products specifically formulated for oiled wood. Water-based cleaners can leave white spots or cause the finish to deteriorate. Oiled floors typically need periodic re-oiling to maintain protection.
Wax-finished floors (common in older homes): Traditional paste wax finishes require buffing to maintain shine and periodic stripping and re-waxing. These floors should never be wet-mopped with water-based cleaners. Instead, use products specifically designed for waxed floors, or consult a flooring professional for proper maintenance.
Unfinished or worn floors: If your floor has areas where the finish is worn through to bare wood, avoid wet cleaning those sections entirely. Moisture will penetrate unprotected wood, causing discoloration and damage. These floors need refinishing to properly protect them before resuming normal cleaning routines.
When in doubt about your floor’s finish, contact your flooring manufacturer or the installer who put the floors down. Many manufacturers provide specific care guidelines for their products, and following these recommendations helps maintain warranties.
Daily, Weekly, and Deep Cleaning Schedule
Establishing a regular cleaning routine prevents dirt buildup and extends the life of your hardwood floors.
Daily maintenance (high-traffic areas):
- Sweep or vacuum entryways, kitchens, and hallways to remove tracked-in dirt
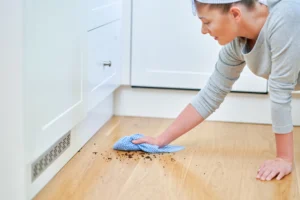
- Wipe up spills immediately with a slightly damp cloth
- Use doormats at all entrances to trap dirt before it reaches your floors
- Quick pass with a microfiber dust mop in the main walking paths
Weekly cleaning (whole floor):
- Vacuum or sweep the entire floor area with proper hardwood attachments
- Damp mop with appropriate hardwood cleaner
- Pay special attention to corners and edges where dust accumulates
- Inspect for scuffs or damage that needs attention
Monthly deep cleaning:
- More thorough damp mopping of the entire floor area, including under furniture (if possible)
- Spot-treat any scuff marks or stubborn spots
- Check for loose boards, squeaks, or finish damage
- Inspect high-traffic areas for wear patterns that might need refinishing
Seasonal or as-needed maintenance:
- Professional deep cleaning (optional but beneficial for high-traffic homes)
- Assessment for refinishing needs (typically every 7-10 years for residential floors)
- Humidity level checking and adjustment if needed (hardwood performs best at 35-55% relative humidity)
How to Handle Spills, Scuffs, and Stains
Quick action prevents minor messes from becoming permanent problems.
Spills: Wipe up any liquid immediately with a soft, slightly damp cloth, then dry the area thoroughly. Water, juice, wine, and other liquids can penetrate the finish cracks and cause dark stains if left sitting. For sticky spills like syrup or soda, dampen your cloth with a small amount of hardwood floor cleaner to dissolve the residue before wiping.
Scuff marks: Most scuff marks are surface-level and can be removed without harsh scrubbing. Try these methods in order:
- Rub gently with a clean, damp microfiber cloth
- Apply a small amount of hardwood floor cleaner to the cloth and rub lightly
- For stubborn scuffs, try a pencil eraser or a specialty scuff remover designed for hardwood
- As a last resort, use extra-fine steel wool or a hardwood floor buff pad with floor cleaner, but test in an inconspicuous area first
Pet accidents: Clean up solid waste first, then blot (don’t rub) any moisture with paper towels. Clean the area with an enzyme-based pet cleaner designed for hardwood floors. Never use ammonia-based cleaners, as they can set pet odor stains.
Grease or oil: Blot up as much as possible with paper towels. Then clean with a small amount of mild dish soap on a damp cloth, followed by a clean water rinse and thorough drying.
Dark water stains: If water has penetrated the finish and created a dark spot, home cleaning won’t fix it. These stains require professional treatment or sanding and refinishing of the affected area.
When to call a professional: If you encounter finish damage, deep scratches, widespread discoloration, or water damage that extends beyond surface level, consult a hardwood flooring specialist. Attempting DIY repairs on serious damage often makes problems worse and more expensive to fix.
Preventing Damage: Long-Term Hardwood Floor Care
Prevention is always easier than repair. These simple habits will keep your floors looking beautiful for decades:
Use entry mats and rugs: Place mats at all exterior doors and encourage family members and guests to wipe feet before entering. This single habit dramatically reduces the amount of abrasive dirt that reaches your floors.
Remove outdoor shoes: Implement a shoes-off policy or provide an indoor shoe swap area. Outdoor shoes track in dirt, small rocks, and moisture, which cause the most floor damage.
Use furniture pads: Attach felt pads to the legs of all furniture. These inexpensive protectors prevent scratches and dents when moving chairs, tables, or other items. Replace pads annually or when they become worn.
Trim pet nails: Keep dog and cat nails trimmed to minimize scratching. Consider using nail caps on cats if scratching is a persistent problem.
Control humidity: Hardwood expands and contracts with humidity changes. Use a humidifier in winter when heating systems dry the air, and a dehumidifier in humid summer months. Maintaining 35-55% relative humidity protects floors from gaps, cupping, or warping.
Protect from direct sunlight: UV rays can fade and discolor hardwood over time. Use curtains, blinds, or UV-protective window film in areas with intense sun exposure. Rotate rugs and furniture occasionally to prevent uneven fading.
Avoid walking in heels: High heels concentrate tremendous pressure on tiny points, causing dents in even the hardest woods. Keep a pair of indoor shoes or slippers handy if you regularly wear heels.
Clean up moisture promptly: Kitchen spills, pet water bowls, plant drip trays, and muddy footprints should be wiped up immediately. Chronic moisture exposure is one of the leading causes of hardwood floor damage.
Frequently Asked Questions About Cleaning Hardwood Floors
What is the best thing to clean hardwood floors with?
For most modern polyurethane-finished hardwood floors, a pH-neutral hardwood floor cleaner like Bona or Method, applied with a damp microfiber mop, provides the safest and most effective cleaning. Alternatively, a solution of a few drops of mild dish soap in warm water works well for occasional cleaning.
Can I use water and vinegar to clean hardwood floors?
While many sources recommend diluted vinegar (1/2 cup white vinegar per gallon of water), this method should be used cautiously. Vinegar’s acidity can gradually dull or damage certain polyurethane finishes over time. Some flooring manufacturers specifically advise against vinegar use. Check your warranty and manufacturer guidelines before using vinegar, and never use it undiluted.
How often should you clean hardwood floors?
High-traffic areas should be swept or vacuumed daily or several times per week. Damp mop the entire floor weekly or bi-weekly, depending on household traffic and dirt levels. Deep cleaning can be done monthly or as needed. The key is removing abrasive dirt before it scratches the finish, so more frequent dry cleaning is better than waiting for visible dirt buildup.
What should you not use on hardwood floors?
Avoid excessive water, steam mops, abrasive scrubbers, harsh chemicals (bleach, ammonia, undiluted vinegar), wax or polish products on polyurethane floors, one-step shine cleaners, and furniture polish. These products can cause water damage, finish deterioration, residue buildup, or dangerous slippery surfaces.
Can you use a steam mop on hardwood floors?
No. Steam mops are not recommended for any type of hardwood floor. The combination of heat and moisture can penetrate finish cracks, seams, and edges, causing warping, cupping, discoloration, and adhesive failure in engineered hardwood. Even floors labeled “sealed” can be damaged by steam mops over time.
How do you make hardwood floors shine?
True shine comes from a clean, residue-free surface, not from added shine products. Regular cleaning with appropriate hardwood cleaners and proper maintenance preserves the natural luster of the finish. If floors look dull despite regular cleaning, the finish may be worn and need professional recoating or refinishing rather than additional cleaning products.
Is Murphy Oil Soap safe for hardwood floors?
Murphy Oil Soap can be used on sealed hardwood floors, but only when properly diluted according to label instructions. Overuse creates a buildup that attracts dirt and dulls the finish. Use it sparingly for occasional deep cleaning rather than routine maintenance. Never use it full-strength or on waxed or oil-finished floors without checking manufacturer compatibility.
What causes streaks on hardwood floors after mopping?
Streaking typically results from too much cleaning solution, residue from inappropriate cleaning products, or a mop that’s too wet. To prevent streaks, use minimal cleaner, ensure your mop is just damp (not wet), and choose residue-free hardwood floor cleaners. Buff with a clean, dry microfiber cloth after mopping if streaks appear.
Final Thoughts: Beautiful Hardwood Floors for Life
Hardwood floors are a significant investment that adds beauty, warmth, and value to your home. Proper cleaning and maintenance don’t require expensive products or complicated techniques—just consistent care using the right methods.
The most important principles to remember are:
- Always remove dirt before wet cleaning
- Use minimal moisture with proper hardwood-safe cleaners
- Work with the wood grain for the best results
- Prevent damage through simple daily habits
- Know your floor’s finish type and clean accordingly
- Address spills and problems immediately
By following the guidance in this comprehensive guide, you’ll keep your hardwood floors looking stunning for decades while avoiding the common mistakes that lead to expensive damage and premature refinishing.
When in doubt about any cleaning method or product, check with your flooring manufacturer or consult a professional flooring specialist. The few minutes spent verifying compatibility can save thousands of dollars in repair costs and preserve your beautiful hardwood floors for generations to come.
