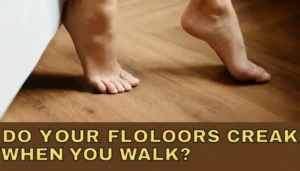
That familiar, annoying squeak. It’s the sound that wakes you up at night or gives away your midnight snack run. But don’t worry. Creaky floors are a common household problem, and most are fixable with a little patience and the right know-how.
This guide will take you through why floors creak and some straightforward, easy ways to prevent them from making a sound. Here are fixes for both hardwood and carpeted floors, from working above the surface to addressing the issue from below.
Why Do My Floors Creak? Understanding the Noise
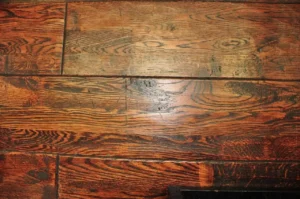
There’s no fixing the squeak before you understand what is causing it. The sound is simply friction. You have one piece of wood rubbing against the other. Typically, this occurs between a floorboard and the subfloor below it.
Nails can work up, wood can dry and shrink, or the subfloor can separate from the joints that support it. The narrowness of the gap provides enough wiggle room for motion, and that motion is what causes the high-pitched creak you hear.
Humidity can be a factor, too. Wood swells when it’s wet and shrinks when it’s dry. Over time, the repetitive nature of this can wear on joints and fasteners, which ultimately causes more noise.
Your Squeaky Floor Toolkit
Going into it with your tools assembled makes the task so much more simple. Your precise tools will depend upon which method you use, but here’s what you might find yourself wanting, if not needing:
For Simple Fixes:
- Talcum powder or powdered graphite
- A small brush or old cloth
For Hardwood & Carpet Repair (From the Top):
- Squeaky floor repair kit (includes special break-off screws)
- A Drill with the Right Size Drill bit
- Screwdriver
- Wood filler in the same color as your floor
For Fixes From Below (Basement/Crawlspace):
- Thin wooden shims
- Construction adhesive
- Hammer
- Utility knife
Method 1: Repairing Creaky Hardwood Floors From the Top
This is the typical approach when you can’t get to the floor from beneath.
The Powder Trick (For Slight Squeaks)
This is the easiest first step. The lubrication allows the boards not to chafe.
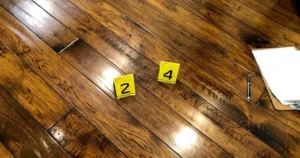
- Find the Squeak: Walk around to find exactly where the squeak is coming from.
- Apply Powder: You can try powder if none of the above methods worked; any talcum or graphite will do.
- Work It In: Apply the powder liberally on the floor, and use a small brush or old rag to work it into all the cracks between boards.
- Remove Excess: Remove any excess powder on the surface. Walk on the spot again to check if the noise is eliminated. This is a temporary solution but for small complaints, it can be extremely effective.
The Screw Method (For a Permanent Fix)
To provide a more lasting result, you will need to reattach the floorboard to the subfloor. The best way to do this without causing any visible marks is through use of a special squeaky floor repair kit.
- Locate the Joist: The strongest connection is to a floor joist. Often you can locate joists by measuring out from a wall (they are usually 16 or 24 inches on center) or by running a stud finder along the ceiling below.
- Use the Kit: These kits come with screws that feature threads at the top and a break-off portion at the bottom. The screw is driven into the floor, through the board and into the joist and subfloor.
- Countersink the Screw: A special screw geometry enables the screw to countersink into a plank and snap clean off.
- Fill the Hole: All you need to do is fill the small pilot hole–sized depression with a dab of matching wood putty. The repair is nearly invisible.
Method 2: Repairing the Squeaking Carpeted Floor from Above
Carpet complicates the matter somewhat, but conceptually it’s still securing subfloor to joist.
- Locate the Squeak: You want to identify the exact location of the sound.
- Use a Carpet-Friendly Kit: There are specialized kits for this type of thing. They work on the same break-off screw technology, but typically have a tool to drive that screw up through the carpet and padding without tearing up fibers.
- Drive the Screw: Hold the tool in place while screwing down until it breaks off. The screw head will catch the subfloor and drag it inward against the joist, taking out the play.
- Check Your Work: The small hole in the carpet is barely visible. Press on the area to make sure the squeak is gone.
Method 3: The Pro Method: Fixing Squeaks From Below
This is absolutely the best one if you have an unfinished basement or a crawlspace. It affords you the opportunity to do a flawless repair with no trace of any mark on your finish floor.
- Get a Helper: Get someone to walk around on the floor above as you watch from below. You can use this to find the location that is moving.
- Inspect the Gap: See if there is a gap between the subfloor and floor joist. When your partner hits the squeaky spot, you’ll see it separate.
- Insert a Shim: Have a shim on hand and when the gap appears, tap that small, thin wooden piece into the space. Take care not to push it too hard, because you can actually spread the gap and develop a new squeak. The idea here is to stuff the space tightly.
- Secure with Adhesive: For a super-strong repair, coat both sides of the shim with construction adhesive before sliding it into place. That is going to hold everything together forever.
- Trim the Shim: Once the adhesive is set, use a utility knife to trim any over-extending portions of the shim.
When to Call a Professional
Though most of them are pretty easy to fix on your own, some might require a pro’s touch. Contact a reputable flooring installer or carpenter if:
- The squeak is widespread: If most of the floor creaks, it could point to a more systemic structural problem.
- You can’t get to it from below: If you can’t address the problem from above, and have no basement or crawl space, a pro might have specialized tools that could make a difference.
- You suspect structural damage: If your floors feel bouncy or sag, and the rattle is paired with cracks in the walls, stop walking and get on the phone with a professional right away.
By addressing the issue yourself, you can bring peace and quiet back into your home. With a bit of elbow grease, you can quiet that creak for good.