Your hardwood floors aren’t just a surface; they’re the foundation of your home. They warm a room, give it character, and tell a story. But maintaining them can be a hassle. You want them to sparkle, but how do you balance shine with the risk of scratches or water damage?
We get it. The good news? It’s not difficult to figure out how to clean hardwood floors properly, all without harsh chemicals or expensive equipment. You need the right technique.
This guide will explain everything you need to know. Whether it’s daily dusting or tackling dirty spots, we have all the facts and tips to keep your floors looking beautiful for a lifetime.
Golden Rule: Always do as little as possible
Before we get into all the cleaning, know this golden rule: wood and water do not play well together. The key, obviously, to keeping wood floors clean is limiting the water.
Think about wiping a table, not mopping the kitchen floor. Your mop should be damp, not soaking wet. Refrain from over-saturation because water can enter the seams of the wood, causing warping, swelling, or staining. Bear in mind this rule, and you’re halfway toward ascending to expert-level cleanliness.
Your Easy Weekly Cleaning Routine
The best way to protect your investment is through a consistent routine. This easy three-step process removes grime that causes scratches without worrying about damaging your floors.
Step 1: Do the Daily Sweep (or Dust)
Dust, pet hair, and grit are enemies of a smooth finish. Those small particles basically work like sandpaper every time you walk across the floor.
What to use:
Best bud = microfiber dust mop. It grabs dust, not just moving it around. A broom with soft bristles also does the trick.
How to do it:
It takes just a quick swab once a day, or even every other day. It only takes a few minutes, and it makes an outsized difference.
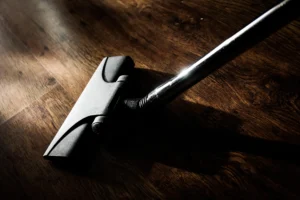
Step 2: The Weekly Vacuum
And while sweeping is great for surface dust, a vacuum will get the gritty stuff hiding between the floorboards.
What to use:
A vacuum cleaner with a floor brush attachment. Avoid the carpet beater bar. It can scratch your wood.
How to do it:
Use the soft brush attachment to clean the floors once a week. This will bring up any dirt your dust mop might have missed.
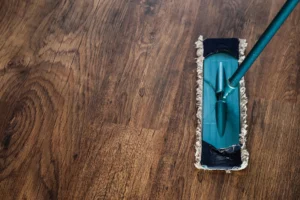
Step 3: The Gentle Mop (When You Need It)
Here is where you really do learn to clean hardwood floors and return them to their natural shine. You only need to do this every week or two, depending on how much foot traffic your floors get.
What do you need:
A good quality wood floor cleaner and a microfiber mop. Search for a pH-neutral soap-free cleanser. Brands such as Bona are both popular and safe for sealed floors.
How to do it:
- Spray the cleaner in a small area of the floor. Never spray it like that all over the place at one go.
- Now mop that portion with your wet microfiber pad.
- Squeeze your mop pad often. It should be just about dry to the touch.
- Go to the next section and repeat until you’ve covered that whole area.
In a matter of minutes, your floors will be dry. If you spot any wet areas, wipe them dry with a clean, soft cloth.
What to Use (And Not Use)
Half the battle is knowing what tools to use. Choose the wrong product and you’re at risk of inflicting permanent damage so pay attention.
The Good Guys: Safe Tools and Products for Your Floors
- pH-Natural Wood Cleaner: This is specially formulated to clean without damaging the protective finish.
- Damp microfiber mops and cloths: They’re soft, absorbent, and trap dust well.
- A Soft Broom: To sweep every day.
The Bad Guys: Things You Should Never Use
- Vinegar and Water: This remedy is perhaps the most common home solution, but vinegar is an acid. Over time, it can erode your floor’s protective finish.
- Steam Mops: They are hardwood floors’ worst enemies. The extreme temperatures and humidity can result in ruining your wood, as well as the finish on it.
- Oil Soaps and Wax-Based Cleaners: They leave behind a sticky film that collects dirt and makes it difficult to refinish your floors later.
- Ammonia or Abrasive Cleaners: They will strip and scratch & dull the finish on your floor’s surface.
Tackling Tough Spots and Stains
Life happens. A spill there, a scuff mark here. Here’s how to respond to common issues without spinning out.
How to Handle Scuff Marks
If the scuffs are very light, you might be able to buff them out with a clean, dry microfiber cloth. For more stubborn marks, a tennis ball does a good job. Rub the scuff with the plush part of a clean tennis ball. The mild scraping can frequently lift away the mark.
Dealing with Pet Messes
Accidents happen. The key is to act fast.
- Blot, don’t rub. Please clean it up with a paper towel or cloth as soon as possible.
- Clean the spot. Lightly spray the area with your wood floor cleaner and wipe it clean with a soft cloth.
- Dry the area. Only walk on the spot once it is completely dry to avoid any water damage.
The Deep Clean: Restoring the Shine
A few times a year, give your floors some extra love. You would then need to apply a high-quality hardwood floor polish after cleaning. This polish isn’t a cleaner; it adds a protective layer that fills micro-scratches and returns a high gloss or satin finish. It’s an easy way to make your floors look like new.
Your Floors, Your Pride
Caring for your hardwood floors shouldn’t be such a chore. With this quick and easy routine, you can protect your investment while having the pleasure of viewing its natural beauty each and every day. Remember the golden rule: be gentle, keep it dry, and enjoy the glow.