Hardwood floors are built to last a lifetime, but they do not take care of themselves. Years of foot traffic, furniture drag, pet claws, sunlight, and spills gradually wear down the finish, deepen scratches, and dull the natural beauty of the wood underneath.
The good news: almost every hardwood floor can be brought back. Whether you are dealing with a few surface scratches, widespread finish failure, warped boards from moisture damage, or a floor that simply looks decades older than it should, this guide covers the full spectrum of DIY repair and restoration, from the simplest quick fixes you can do in an afternoon to the full professional-grade refinishing process used by flooring contractors.
This is not a surface-level overview. Every method, every tool, and every decision point is explained in detail so you can assess your specific floor and execute the right approach with confidence.
1. Assess Your Floor First: What Kind of Damage Are You Dealing With?
The single most important step in any hardwood floor restoration project is correctly identifying what you are working with. Applying the wrong treatment wastes time and money, and in some cases, makes the problem permanently worse.
Step 1: Identify Your Wood Species and Current Finish
Different wood species respond differently to sanding, staining, and finishing. Oak is an open-grain wood that absorbs stain readily and consistently. Maple and Birch are closed-grain, meaning stain tends to blotch unless a pre-conditioner is used first. Pine is soft and prone to denting; Hickory and Brazilian Cherry are extremely hard and require different sanding grit sequences.
Knowing your finish type is equally critical before you do anything:
- Drop a small amount of water on an inconspicuous area. If it beads up cleanly, the finish is intact. If it soaks in and darkens the wood within 30 seconds, the finish has failed and bare wood is exposed.
- Rub a white cloth dampened with mineral spirits across the floor. If wax transfers to the cloth, you have a wax finish. Traditional water- or oil-based polyurethane will not bond over wax — the surface must be stripped or a wax-compatible finish must be used.
- Scratch a hidden area lightly with a coin. Polyurethane finishes produce a faint white powder; oil finishes leave a greasy residue; wax finishes scrape off in a waxy, semi-translucent flake.
Step 2: Categorize the Damage
Hardwood floor damage falls into four categories, each requiring a different treatment approach:
| Damage Type | Visual Signs | Correct Treatment |
| Surface Wear / Dullness | Faded sheen, fine scratches, scuffs | Screen & Recoat |
| Scratches & Gouges | Visible grooves, dents, and deep scratches | Filler repair + local refinish OR full sand |
| Finish Failure | Peeling, flaking, widespread crazing | Full sand and refinish |
| Moisture Damage | Cupping, crowning, buckling, black stains | Dry out, structural repair, then refinish |
Step 3: Check If Your Floor Can Be Sanded Again
Most solid hardwood floors are 3/4 inch thick and can be sanded 3 to 5 times over their lifetime. Each full sand removes approximately 1/16 to 1/8 inch of wood. Before committing to a full refinish, locate the nearest floor vent, remove it, and look at the edge of the flooring from the side. You should be able to see the thickness of the wear layer above the tongue and groove. If less than 3/32 inch of material remains above the groove, the floor cannot be safely sanded again without risking structural compromise.
Engineered hardwood floors have a thinner solid wear layer, typically 1/8 inch or less, and can usually only be sanded once or twice. Always confirm this before renting a drum sander.
| PRO TIP: Check your floor thickness before renting equipment. Sanding an engineered floor that has already been refinished can expose the plywood core, which cannot be stained and requires full board replacement. |
2. How to Repair Scratches, Gouges, and Small Damage Without Full Refinishing
Not every imperfection requires a full floor refinishing. Minor to moderate damage can often be addressed with targeted repairs that save significant time, money, and floor thickness.
Fixing Light Surface Scratches
Light scratches that have only penetrated the finish — not the wood itself — can frequently be made invisible without any sanding at all.
- Clean the scratched area thoroughly with a hardwood floor cleaner and let it dry completely.
- Apply a stain marker or blending pencil that matches your floor color. These are available at flooring specialty stores and in a wide range of wood tones. Work the color into the scratch using light strokes along the grain direction.
- Wipe away any excess with a clean cloth before it dries.
- Once the color has set (10–15 minutes), apply a thin coat of finish-matching touch-up product — either a water-based or oil-based floor finish pen — over the repaired area to seal it. Feather the edges so there is no visible buildup line.
- Buff lightly with a soft cloth once dry.
For minor scratches across a larger area, a restorer product like Bona Hardwood Floor Refresher can be mopped across the entire floor to fill in micro-scratches and restore a uniform sheen without any abrasion.
Filling Deep Gouges and Dents
For damage that has penetrated through the finish and into the raw wood fiber — dents from dropped objects, deep pet scratches, or gouges from furniture — a stainable wood filler is required.
- If the surrounding finish is still intact, use fine-grit sandpaper (120 to 150 grit) to lightly feather the edges of the damaged area. This helps the filler and finish blend more seamlessly.
- Select a stainable wood filler that matches your floor’s species. Latex-based fillers work well for smaller repairs; two-part epoxy wood filler is better for large voids and structural gaps because it does not shrink upon curing.
- Apply the filler with a plastic putty knife, pressing firmly to pack the void. Leave the fill slightly mounded above the surface — fillers shrink as they dry, and an underfilled repair is far more visible than an overfilled one.
- Allow to cure fully according to the manufacturer’s directions. Do not rush this step; undercured filler will crumble when sanded.
- Sand flush with 120-grit sandpaper, always moving with the grain. Finish with 150-grit for a smooth final surface.
- Apply stain if necessary to match the surrounding wood, then seal with 2 thin coats of a matching finish. Feather the edges of each coat.
| IMPORTANT: Test your stain color on a scrap piece of the same wood or in a hidden area before applying it to the repair. Filler materials absorb stain differently than raw wood, and color matching requires adjustment. |
Repairing Squeaky Boards
Squeaking occurs when boards rub against each other or against the subfloor due to loose fasteners or seasonal wood movement. There are two reliable fixes depending on access:
- From above (no basement access): Drill a pilot hole at an angle through the squeaking board and into the subfloor or joist below. Drive a construction screw to pull the board down tight. Countersink the head, fill with color-matched wood putty, and touch up with finish.
- From below (basement or crawlspace access): Have a helper stand on the squeaking area while you identify the movement from below. Drive a wood screw up through the subfloor and into the back of the hardwood board. Size the screw carefully — it must not penetrate through the top surface.
- For minor squeaks between boards: Sprinkle powdered graphite or talcum powder into the joint and work it in with a stiff brush. This lubricates the contact point and eliminates friction noise without any structural work.
Replacing Individual Damaged Boards
Some damage — severe cupping, black staining from pet urine, irreparable structural cracks, or rotted wood — cannot be repaired with filler. Those boards must be removed and replaced.
This is one of the most skill-intensive DIY flooring tasks, but it is entirely achievable with the right tools and careful execution.
- Using a plunge router or oscillating multi-tool, make a cut down the center of the damaged board, running parallel to the grain from end to end. Cutting down the center — rather than along the edges — relieves tension in the board and prevents the router from veering into adjacent healthy boards.
- Make two additional cuts parallel to the first, cutting the board into thirds. Use a wood chisel to break out the center section.
- Carefully pry out the remaining edge pieces. Work slowly and never lever directly off the adjacent boards — you will damage their edges.
- Clean the subfloor of all adhesive residue, nails, and debris.
- Source a replacement board of the same species, grade, dimensional size, and grain orientation. Ideally, use boards from the same original batch (this is why saving leftover flooring from the original installation is always recommended).
- Remove the bottom lip of the groove on the new board using a table saw or hand plane. This allows the board to drop into position over the existing tongue without needing to slide in from the end.
- Apply construction adhesive to the subfloor and set the board in place. Secure with blind-nailed finishing nails where possible, or face-nail, countersink, and fill at the ends.
- Sand the replacement board to blend with the surrounding floor, apply matching stain, and finish with 2–3 coats to match the existing sheen level.
| PRO TIP: Black stains from pet urine often penetrate 1/4 inch or more into the wood. Sanding rarely reaches the bottom of the stain. In most cases, board replacement is the only permanent fix. Attempting to bleach these stains with oxalic acid can work on moderate cases but requires neutralization and re-finishing of the entire surrounding area. |
3. How to Fix Moisture-Damaged Hardwood Floors: Cupping, Crowning, and Buckling
Moisture damage is the most serious and most mishandled category of hardwood floor problems. The most common mistake homeowners make is sanding a wet or moisture-affected floor to flatten it — which can cause irreversible damage.
Understanding What Moisture Does to Wood
Wood is hygroscopic, meaning it continuously absorbs and releases moisture in response to its environment. When moisture content increases, the wood fibers swell. When it decreases, they shrink. When this happens unevenly across the width of a board, the board distorts:
- Cupping: The edges of each board rise higher than the center. This is caused by excess moisture on the bottom of the board (often from a leaking subfloor, concrete moisture, or flooding) while the top surface remains drier.
- Crowning: The center of each board is higher than the edges. This is frequently the result of incorrectly sanding a cupped floor before it has fully dried. As the wood dries and the edges drop, the previously flattened center is now proud.
- Buckling: The boards lift completely off the subfloor. This is caused by severe moisture expansion with no expansion gap to accommodate movement. It often occurs after flooding.
The Correct Approach to Moisture Repair
- Identify and eliminate the moisture source first. No restoration work is effective if the water intrusion continues. Check for plumbing leaks, HVAC condensation, subfloor moisture, and foundation water ingress.
- Extract standing water immediately using wet vacuums and mops. Do not use steam or heat to speed drying, rapid drying causes the wood to crack and check.
- Deploy industrial-grade dehumidifiers and air movers. Professional water damage companies rent this equipment. Target an interior relative humidity of 35–45% to accelerate controlled drying.
- Monitor moisture content daily using a wood moisture meter. The target baseline for most hardwood floors is 6–9% moisture content. Do not begin any sanding until readings are consistently within this range.
- Allow the floor to dry naturally. Depending on the severity, this can take 4 to 8 weeks. Patience here prevents the much more expensive problem of crowning after premature sanding.
- Once the floor is fully dry, reassess. Mild cupping (less than 1/16 inch variation) often self-corrects as the wood returns to its equilibrium moisture content. Severe cupping that does not self-correct after full drying can then be sanded flat safely.
Addressing Buckling
Buckled floors require the most intervention. The boards must be carefully removed to prevent cracking, the subfloor must be dried and repaired, and the boards themselves must be assessed for usability. Boards that have been submerged for more than 24–48 hours often develop permanent deformation and internal mold and must be replaced rather than reused.
| CRITICAL: Never sand a cupped floor flat while it is still wet or partially wet. When the wood dries and contracts, a floor that was sanded flat while wet will become crowned — the center will be higher than the edges — and the only fix at that point is another complete sand, removing more irreplaceable floor thickness. |
4. Screen and Recoat: The Fastest Way to Restore a Dull Hardwood Floor
Screen and recoat is one of the most valuable and underutilized restoration techniques available to homeowners. If your floor’s finish is dull, lightly scratched, and uniformly worn — but the bare wood is not exposed and there is no deep structural damage, a screen and recoat can restore the floor to like-new appearance in a single day without any significant dust, disruption, or floor thickness loss.
What Screen and Recoat Does
Rather than sanding down to bare wood, a screen and recoat uses a fine mesh abrasive screen (typically 120 to 150 grit) mounted on a rotary floor buffer to lightly abrade the very top of the existing finish. This creates microscopic mechanical adhesion points, tiny scratches that the new topcoat can bond to. A fresh coat of polyurethane or finish is then applied over the screened surface.
The result is a floor that looks freshly finished without the cost, mess, or time commitment of a full sand and refinish. The process typically takes 3 to 5 hours for an average room, with a cure time of 24 hours before light foot traffic.
When Screen and Recoat Works (and When It Doesn’t)
| Screen & Recoat WORKS | Screen & Recoat WILL NOT WORK |
| Uniform dullness and minor scuffs | Deep scratches penetrating to bare wood |
| Finish scratches that haven’t reached the wood | Peeling, flaking, or delaminating finish |
| Structurally sound floors | Moisture damage/cupping / crowning |
| Floors with a compatible finish type | Wax-finished floors (incompatible) |
| Floors that have not been waxed or oiled recently | Floors with silicone-based cleaner buildup |
How to Screen and Recoat: Step by Step
- Clear the room completely. Remove all furniture and rugs.
- Clean the floor thoroughly with a hardwood floor cleaner — not a general-purpose cleaner. Residue from waxes, silicone-based polishes, or oils will prevent the new finish from bonding and cause peeling within weeks. If there is any wax present, the floor must be stripped before proceeding.
- Load a 120-grit screen onto a rotary floor buffer. Work the buffer in slow, overlapping passes across the entire floor. The buffer should move continuously, lingering in one spot creates visible swirl marks.
- Use a pole sander with 120-grit sandpaper to manually screen along the edges and corners where the buffer cannot reach.
- Vacuum the entire floor meticulously with a hard-floor vacuum attachment. Follow with a tack cloth or a microfiber mop lightly dampened with water to capture all fine dust.
- Allow the floor to dry completely (15 to 20 minutes) before applying the new finish.
- Apply the finish using a T-bar applicator or a quality synthetic applicator pad, working in smooth, overlapping strokes in the direction of the wood grain. Start at the far wall and work toward the exit. Maintain a wet edge at all times to prevent lap marks.
- Allow to dry according to the finish manufacturer’s specifications. Most water-based finishes are ready for a second coat in 2–3 hours; oil-based finishes require 12–24 hours between coats.
- Apply a second coat following the same process. For high-traffic areas, a third coat is recommended.
| PRO TIP: Do not use a microfiber mop applicator if applying oil-based polyurethane; use a lambswool pad or a natural-bristle T-bar instead. Oil-based finishes and synthetic microfibers are chemically incompatible and produce bubbles and streaks. |
5. Full Hardwood Floor Refinishing: The Complete Process
A full sand-and-refinish is the most comprehensive restoration option — and the most demanding. When executed correctly, it returns any hardwood floor to essentially new condition regardless of its current state. This is the appropriate choice when screen and recoat is insufficient: the finish has completely failed, deep scratches penetrate to bare wood, staining is widespread, or the floor surface is uneven.
Tools and Equipment You Need
| Tool / Equipment | Purpose | Key Notes |
| Drum Sander | Remove old finish and level the main field | Never stop moving; a stationary drum creates an unfixable divot in seconds |
| Edger Sander | Sand the perimeter that the drum cannot reach | Aggressive; causes circular gouges if not handled steadily |
| Orbital / Multi-Disc Sander (Buffer) | Blend edger and drum marks; final smoothing | Essential step — skipping it leaves visible transition lines |
| Moisture Meter | Measure wood moisture before finishing | Finish applied over wet wood clouds and peels |
| Shop Vacuum (HEPA) | Dust collection between passes | Dust contamination ruins the final finish coat |
| Half-Face Respirator (P100) | Protect from fine wood dust and VOCs | N95 masks are not sufficient for sanding dust |
| Safety Glasses, Knee Pads | Personal protection | Non-negotiable for any sanding work |
| SAFETY NOTE: Wood sanding dust is highly flammable. Turn off all pilot lights, eliminate open flames, and use dust-collection bags on all equipment. Empty bags frequently and dispose of them outside the home immediately. |
Room Preparation: The Step Most People Skip
- Remove all furniture, rugs, curtains, and wall decor from the room.
- Remove all baseboard shoe molding carefully. Number each piece on the back so it reinstalls in exactly the same position. Shoe molding is thin and breaks easily; work slowly with a stiff putty knife.
- Inspect the entire floor for protruding nails and nail heads. Countersink every nail at least 1/8 inch below the surface using a nail set and hammer. A nail that contacts a sanding belt will destroy the belt instantly and create sparks.
- Seal all doorways with heavy plastic sheeting and painter’s tape. Cover HVAC vents, electrical outlets, and any fixed cabinetry. Drum-sander dust is extraordinarily fine and will penetrate throughout the entire house if the room is not sealed.
- Clean the floor with a hardwood cleaner to remove surface oils, waxes, and grime that would otherwise clog sandpaper prematurely.
The NWFA Grit Sequence: Why It Matters
The National Wood Flooring Association (NWFA) specifies strict grit sequence guidelines for a reason. The rule is simple: never skip more than one grit level in the sequence.
Coarse sandpaper (36 or 40 grit) cuts rapidly but leaves deep, uniform scratches in the wood. Each successive grit removes the scratches left by the previous grit and replaces them with shallower ones. The final fine grits leave scratches too shallow to be visible to the naked eye. If you skip a grit, you jump from deep scratches to fine sandpaper that cannot remove them — the result is “pig-tail” swirl marks that remain invisible until stain is applied, at which point they become glaringly obvious, and the only fix is to start over.
| Pass | Grit | Tool | Purpose |
| 1st Cut | 36 or 40 | Drum Sander | Remove old finish; level uneven boards |
| Edging | 60 | Edger Sander | Perimeter first-pass material removal |
| 2nd Cut | 60 | Drum Sander | Remove 40-grit scratch pattern |
| Edging | 80 | Edger Sander | Second-pass perimeter smoothing |
| 3rd Cut | 80 | Drum Sander | Refine surface; remove 60-grit marks |
| Final Cut | 100 (or 120 for hard species) | Drum Sander | Final smoothness before finishing |
| Buffing | 100–120 Screen | Orbital Buffer | Blend edger marks; homogenize porosity |
Operating the Drum Sander: Critical Technique
The drum sander is the most dangerous piece of equipment in this process — not because of injury risk, but because of the damage it can inflict on your floor in a fraction of a second if used incorrectly.
- Always keep the drum sander moving whenever the drum is in contact with the floor. Lower the drum, begin walking, and maintain a steady walking pace. Never stop mid-pass with the drum engaged.
- Work parallel to the wood grain at all times. Sanding across the grain creates deep, permanent scratches that are extremely difficult to remove.
- Overlap each pass by 3 to 4 inches to ensure consistent coverage and avoid visible sanding lines.
- At each end of the room, tilt the machine back to lift the drum before reversing direction. The drum should never be in contact with the floor while the machine is stationary.
- For the first cut (36 or 40 grit), expect to make 3 to 4 complete passes over the main field before the finish is fully removed.
Blending Edger and Drum Sander Marks
The edger operates in a circular motion, leaving curved scratch marks. The drum sander operates linearly. Where these two areas meet, the transition will be visible — unless it is properly blended with the orbital buffer.
After all drum and edger passes are complete, run the orbital/multi-disc buffer over the entire floor with a 100 or 120-grit screen. The buffer’s random orbital motion blends both scratch patterns into a single, uniform surface with consistent porosity. This step is what separates floors that look professionally finished from those that look obviously DIY.
After buffing, vacuum the entire floor twice with a HEPA vacuum. Follow with a tack cloth pass. A single grain of sanding dust trapped under the finish coat will be visible as a permanent bump.
6. How to Stain Hardwood Floors: Technique and Color Selection
Staining is optional — many homeowners prefer the natural color of their wood and apply finish directly over raw sanded wood. But if you are changing the color of your floor or restoring a stained floor to its original tone, getting the staining process right is critical. Errors in staining are nearly impossible to correct without sanding down to bare wood again.
Water Popping: The Advanced Technique for Deeper, More Uniform Color
When wood is sanded, the grain fibers get compressed and burnished by the abrasion. This slightly closes the grain and reduces stain absorption, which can result in uneven color uptake — particularly problematic with dark stains.
Water popping solves this. Immediately before staining, wipe the entire floor evenly with a clean mop or microfiber pad dampened with clean water. The water causes the compressed grain fibers to swell and stand up, opening the grain like a sponge. Once the floor is completely dry, it absorbs stain far more deeply and evenly than a floor that was not water-popped.
The floor must be completely dry before staining — test it with a moisture meter and ensure the reading has returned to baseline. Staining over any residual moisture causes the stain to lift and streak.
Applying Stain
- Pour stain into a clean roller tray. Do not use stain straight from the can, which can lead to uneven application as the solids settle.
- Apply in sections of 3 to 4 board widths at a time, working in the direction of the grain. Use a staining pad, lambswool applicator, or clean rag to apply the stain, working it into the grain.
- Allow the stain to penetrate for 3 to 5 minutes — read the manufacturer’s directions, as open time varies by product.
- Rag off the excess stain vigorously with clean, lint-free cloths. Any stain left on the surface will not dry properly and will remain tacky, preventing the topcoat from bonding.
- Maintain a wet edge. Never let one section dry while an adjacent section is still wet — the overlap line will show as a dark band once finished.
- Allow the stain to dry fully before applying finish. Most oil-based stains require 8 to 24 hours; water-based stains dry in 2 to 4 hours.
| PRO TIP: Test your stain color on an inconspicuous area — or on scrap boards of the same species — before staining the main floor. Stain behaves differently on different wood species, and the color on the can lid is rarely an accurate representation of how it will look on your specific wood. |
7. Choosing the Best Finish for Hardwood Floors and How to Apply It
The finish is the most important decision you make in a refinishing project. It determines durability, appearance, maintenance requirements, and how the floor ages over time. The three main categories are oil-based polyurethane, water-based polyurethane, and hardwax oils.
Oil-Based Polyurethane
Oil-based polyurethane has been the standard for residential hardwood floors for decades. It is durable, relatively forgiving in application, and produces a warm amber tone that deepens beautifully as it ages. However, it has significant drawbacks in the modern context:
- Drying time: 12 to 24 hours between coats. A 3-coat job takes 3 to 4 days minimum.
- Full cure: 30 days. Heavy furniture should not be moved back for at least 2 weeks.
- High VOCs: Strong fumes require excellent ventilation and a high-quality respirator throughout application. Not suitable for households with pets, children, or health sensitivities during the curing period.
- Amber hue: Beautiful on Oak, Walnut, and warm-toned woods; can make lighter species like Maple or Ash appear yellowish over time.
Water-Based Polyurethane
Water-based polyurethane is the current professional choice for most residential applications. Products like Bona Traffic HD represent a significant leap forward from oil-based alternatives:
- Drying time: 2 to 3 hours between coats. A 3-coat job can be completed in a single day.
- Full cure: 3 to 7 days, depending on the product.
- Very low VOCs: Far safer for indoor air quality during and after application.
- Crystal clear finish: Preserves the natural color of the wood without any yellowing. Essential for light-colored species like White Oak, Maple, and Nordic-style floors.
- Harder film: Premium water-based polyurethanes form a harder, more scratch-resistant film than oil-based products.
- Higher cost: Premium water-based finishes cost 30 to 50% more per gallon than oil-based alternatives.
Hardwax Oil
Hardwax oil finishes are a premium, European-origin option that has grown significantly in popularity in the United States. They work fundamentally differently from polyurethane:
Rather than forming a film on top of the wood surface, hardwax oils penetrate the wood fibers and bond molecularly from within. The result is a finish that looks and feels like natural wood — matte, tactile, warm — with no plastic-like surface film.
- Appearance: Highly natural, matte aesthetic. The wood looks and feels like wood, not like a coated surface.
- Spot repair: The most significant advantage. If a section is damaged, you can sand just that area and re-oil it without refinishing the entire floor. The repair blends invisibly.
- Maintenance: Requires periodic re-oiling (every 12 to 24 months in high-traffic areas) to maintain protection.
- Durability: Less resistant to chemical spills than polyurethane. Not ideal for kitchens or pet-heavy households without diligent maintenance.
| Finish Type | Sheen / Look | Dry Time | Full Cure | VOC Level | Spot Repair | Best For |
| Oil-Based Poly | Warm amber | 12–24 hrs | 30 days | High | No | Traditional looks, budget-focused |
| Water-Based Poly | Crystal clear | 2–3 hrs | 3–7 days | Low | No | Modern looks, light-colored woods, fast turnaround |
| Hardwax Oil | Matte, natural | 4–6 hrs | 7–14 days | Medium | Yes | Premium natural aesthetic, low-dust homes |
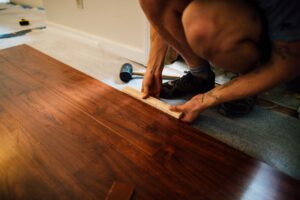
How to Apply Polyurethane: Coat by Coat
- Confirm the floor is dust-free and the moisture content of the wood is within the acceptable range (6–9%). Check that room temperature is between 65°F and 80°F and relative humidity is between 35% and 55%. Finish will not cure correctly outside these parameters.
- Apply the first coat using a T-bar applicator or a premium synthetic applicator pad. Work in the direction of the grain, starting at the far wall and moving toward the exit door. Apply in smooth, overlapping strokes, keeping a consistent wet edge.
- Allow to dry fully. The first coat will raise the wood grain slightly, making the surface feel rough. This is expected.
- Lightly buff the floor with a 220-grit screen on the orbital buffer. This knocks down the raised grain without removing material. Vacuum and tack-cloth the entire floor.
- Apply the second coat using the same technique. For most applications, the second coat is the most critical for even coverage and proper build.
- Apply a third coat without any intermediate buffing. This is the wear coat. Apply it carefully and consistently. Avoid overworking the finish, which introduces bubbles.
- Do not walk on the floor for 24 hours. Allow a full 48 to 72 hours before replacing furniture (use felt pads). Allow 30 days before placing area rugs (for oil-based finishes).
| AVOID: Applying finish over wax, silicone polish, or any surface that has not been properly screened and cleaned. The finish will not bond, and peeling will occur within weeks. If in doubt, test adhesion by applying a small amount of finish to a cleaned test area and letting it cure for 24 hours. Try to lift it with your fingernail — if it peels cleanly, the surface is contaminated. |
8. How to Polish Hardwood Floors and Restore Shine Without Sanding
Polishing is distinct from refinishing. It does not involve any abrasion or new finish application. Floor polish is a thin, liquid product that fills micro-scratches in the existing finish, adds a protective layer, and restores optical shine — all without any preparation beyond cleaning.
When Polish Is the Right Choice
Polishing is the appropriate treatment when:
- The floor finish is still largely intact but looks dull and worn
- You have used a restorer or polish previously and want to top it up
- You want a quick cosmetic refresh between deeper restoration cycles
- The floor is in a room with low traffic that mainly suffers from accumulated cleaning residue and reduced sheen
How to Polish Hardwood Floors
- Sweep and vacuum the entire floor to remove all loose debris.
- Mop with a pH-neutral hardwood cleaner and allow to dry completely. Polishing over any residue or moisture will create hazy, cloudy patches.
- Apply the floor polish in small sections using a clean microfiber flat mop. Pour a small amount directly onto the floor and spread in thin, even strokes in the direction of the grain.
- Overlap each stroke slightly. Do not apply more than a thin coat at a time — polish builds haze and streaks if applied too thickly.
- Allow to dry for 30 to 45 minutes (or per manufacturer’s directions) before walking on the floor.
- For higher sheen, apply a second thin coat after the first has dried completely.
What Polish Cannot Fix
It is important to have realistic expectations. Floor polish cannot fill deep scratches, cannot restore peeling or delaminated finish, and cannot address bare wood exposure. If the finish has worn through to bare wood in any area, polish will not adhere in those spots and will create an uneven appearance. These areas require the repair and refinishing methods described in earlier sections of this guide.
| WARNING: Do not use paste wax, furniture wax, or spray silicone products on polyurethane-finished floors. These products contaminate the surface and make future screen and recoat applications impossible. If a wax or silicone product has been applied, the floor must be stripped before any further finishing work. |
9. Long-Term Hardwood Floor Maintenance to Protect Your Restoration
The single most effective way to extend the life of a restored hardwood floor is consistent preventative maintenance. A floor that is properly cared for after restoration will maintain its appearance for 10 to 15 years before needing another screen and recoat, and potentially 30 to 50 years before a full refinish is necessary.
Daily and Weekly Cleaning
- Sweep or dust-mop daily in high-traffic areas. Sand, grit, and fine debris act like sandpaper against the finish with every footstep. A quick daily sweep costs nothing and can extend finish life by years.
- Vacuum weekly using a vacuum with a hard-floor attachment. Never use a vacuum with a rotating beater bar, which aggressively scratches polyurethane finishes.
- Damp mop with a pH-neutral, hardwood-specific cleaner. The mop should be barely damp — wring it out thoroughly until no dripping occurs. Water that pools on a hardwood floor is damaging even to a well-maintained finish.
- Never use vinegar, ammonia-based cleaners, bleach, or general-purpose tile or bathroom cleaners on hardwood floors. These products break down the finish over time.
- Never use a steam mop. Steam forces moisture directly into the wood joints, causing expansion, finish delamination, and accelerated structural degradation. This is one of the most common causes of premature floor failure.
Managing Indoor Humidity
Wood is a living material that continues to respond to environmental conditions long after it has been cut, milled, and installed. Keeping your home’s relative humidity between 35% and 55% year-round is the single most important environmental control you can maintain for a hardwood floor’s longevity.
In winter, dry forced-air heating drops indoor humidity well below 35%, causing wood to contract, board gaps to appear, and surface finishes to crack along the grain. In humid summers without air conditioning, moisture causes boards to expand and cup. A whole-house humidifier in winter and a dehumidifier or well-maintained air conditioning in summer maintains the moisture equilibrium that keeps hardwood floors stable.
Protective Measures That Prevent Damage
- Use felt pads under all furniture legs, and check them quarterly. Felt pads wear through and become abrasive when the fabric is gone.
- Place high-quality entrance mats at every exterior door. These intercept the grit and moisture that do the most damage to floors. The mat should be large enough that multiple walking steps occur on it before reaching the hardwood.
- Implement a no-shoes policy or at a minimum a no-outdoor-shoes policy. The bottom of outdoor shoes carry sharp grit, road debris, and stone chips that scratch finish more aggressively than anything else in a typical home.
- Trim pet nails regularly. Long pet nails produce deep scratches that penetrate through the finish and into the wood fiber, requiring filler repair.
- Use furniture sliders or blankets when moving heavy objects. Even dragging a couch a few inches can produce a deep, irreparable gouge in finished hardwood.
Restoration Schedule: When to Do What
| Timeframe | Action | Cost Level | Disruption |
| Every 2–3 months | Clean and inspect for damage | Minimal | None |
| Every 12–18 months | Polish or apply floor restorer | Low | 1 day |
| Every 3–5 years | Screen and recoat | Moderate | 1–2 days |
| Every 20–30 years | Full sand and refinish | High | 4–7 days |
| As needed | Individual board replacement | Moderate–High | 1–3 days |
10. Frequently Asked Questions About Hardwood Floor Restoration
Can I refinish hardwood floors myself, or do I need a professional?
Yes, you can refinish hardwood floors yourself. The process is demanding but manageable for a careful DIYer. Screen and recoat is well within reach for most homeowners and produces excellent results with a rented buffer and basic technique. A full sand-and-refinish requires renting a drum sander and edger, following a precise grit sequence, and careful finish application — it is harder, but thousands of homeowners complete it successfully every year. The biggest risks are operating the drum sander incorrectly (which can permanently damage the floor) and poor finish application technique. If the floor has significant structural damage, cupping, or is a rare or delicate species, hiring a professional is the safer investment.
How much does it cost to refinish hardwood floors yourself vs. hiring a contractor?
DIY refinishing typically costs $1.00 to $1.50 per square foot in materials and equipment rental, compared to $3.00 to $8.00 per square foot for professional refinishing. For a 500-square-foot floor, that is $500 to $750 DIY versus $1,500 to $4,000 professionally. However, the DIY cost does not account for the time investment (2 to 4 days for a complete refinish), and mistakes can increase the cost substantially. Screen and recoat is even more economical: $0.50 to $1.00 per square foot in materials.
How long does it take to refinish hardwood floors?
A full sand-and-refinish on an average room (200 to 400 square feet) takes approximately 3 to 5 days from start to finish when using water-based polyurethane: 1 day for sanding, 1 day for staining, and 1 to 2 days for 3 coats of finish with cure time between coats. Oil-based polyurethane adds 2 to 3 days due to longer dry times. The floor is safe for light foot traffic within 24 to 48 hours of the final coat but should not have heavy furniture placed on it for 1 to 2 weeks, and area rugs should wait 30 days (for oil-based finish).
How do I know if my hardwood floor can be refinished or needs to be replaced?
Check the remaining wear layer thickness. Locate a floor vent, remove the register, and look at the edge of the flooring from the side. If you can see at least 3/32 inch of solid wood above the tongue-and-groove joint, the floor can likely be sanded again. A floor that is structurally sound, squeak-free, and shows no signs of active moisture intrusion can almost always be restored rather than replaced — even if it looks terrible on the surface. Replacement should only be considered when boards are physically rotted, the subfloor is compromised, or the wear layer is exhausted.
What is the best finish for hardwood floors in a high-traffic home?
For high-traffic households, a premium water-based polyurethane with an aluminum oxide additive provides the best combination of durability, hardness, and ease of maintenance. Products like Bona Traffic HD or Loba 2K Invisible Pro consistently outperform standard oil-based polyurethane in abrasion resistance tests while curing faster and producing lower VOC emissions. Three coats are recommended for high-traffic areas. For households with pets or children, adding a fourth coat in the highest-traffic corridors is a worthwhile investment.
How do I fix scratches on hardwood floors without refinishing?
For light surface scratches that have not penetrated to bare wood: clean the area, apply a wood stain marker matching your floor color, allow to set, and seal with a finish touch-up pen. For deeper scratches reaching bare wood: use stainable wood filler, sand flush when cured, apply matching stain, and seal with 2 thin coats of finish. For widespread light scratching across the full floor, a screen and recoat — without any staining — will make the floor look new in a single day.
Can engineered hardwood floors be refinished?
Yes, most engineered hardwood floors can be refinished once, and some premium engineered products with a thicker wear layer (3mm or more) can be done twice. The process is identical to solid hardwood, but the sanding must be lighter and more controlled to avoid cutting through the thin veneer into the plywood core beneath. Always confirm your wear layer thickness before proceeding. Engineered floors thinner than 3/8 inch total thickness should generally not be sanded; screen and recoat is the safer option for these products.
How do I stop hardwood floors from squeaking after refinishing?
Squeaking after refinishing is usually caused by boards rubbing against each other or against the subfloor as foot pressure causes slight flex. The most reliable fix from above: drill an angled pilot hole through the squeaking board into the subfloor or joist and drive a trim screw to pull the board tight. Countersink the head, fill with color-matched wood putty, and touch up with finish. For minor squeaks, powdered graphite or talcum powder worked into the joint often resolves the noise without any drilling.
Final Thoughts: Your Hardwood Floor Is Worth Restoring
A worn or damaged hardwood floor is not a floor that needs to be replaced — in almost every case, it is a floor that needs to be restored. The wood underneath even the most beaten-looking surface is the same durable, beautiful material it was when it was first installed. The process of bringing it back is labor-intensive, but the result is a floor that looks brand new, lasts another 20 to 30 years, and adds genuine value to your home.
Start by correctly assessing the damage category. Match your approach to what the floor actually needs, whether that is a simple polish, a targeted scratch repair, a screen and recoat, or a full sand-and-refinish. Execute each step carefully, respect the cure times, and maintain the floor properly once it is restored.
The difference between a floor that lasts and one that fails prematurely is not the product you use; it is the preparation, the attention to detail, and the maintenance habits that follow.
At Willow Flooring, we carry professional-grade hardwood floor finish products, sanding supplies, repair kits, and maintenance tools for every stage of this process. Visit willow-flooring to shop our full collection, or contact our flooring experts for a personalized recommendation for your specific floor.
